Overview: The iDRAC Enterprise enables you to work on the server configuration options using a browser, without physically connecting a keyboard, mouse, and screen to the server. This is a requirement when installing PeerApp 6.2.1
Step by step:
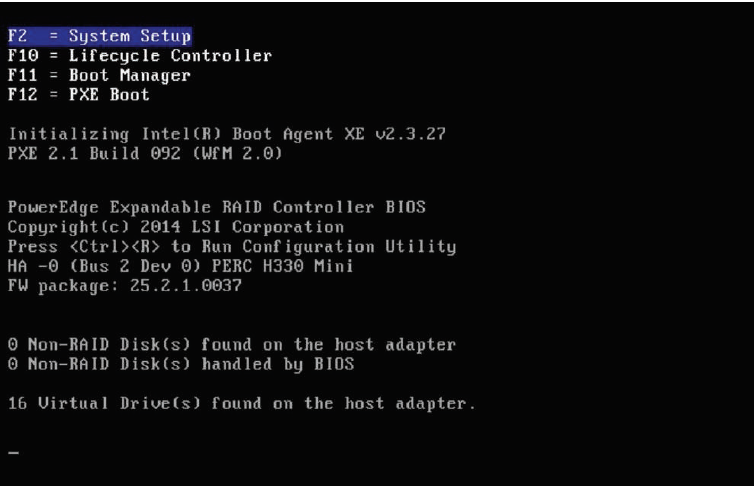
- From the Boot screen, click F2 to enter the Setup Menu.
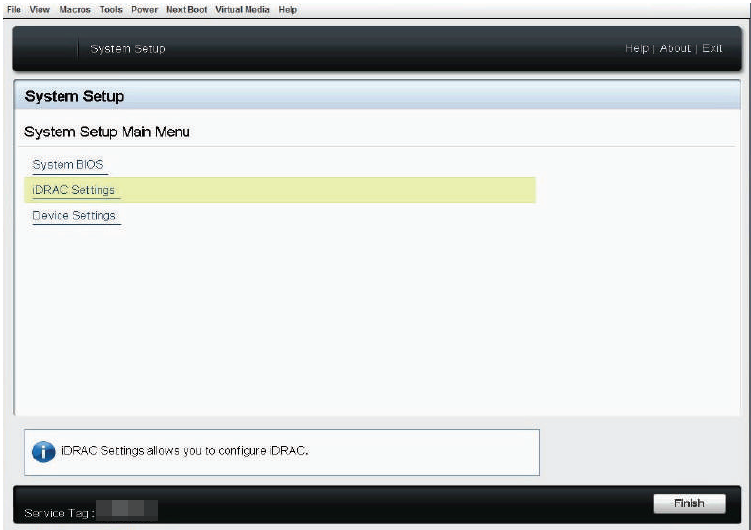
- From the System Setup Menu, select iDRAC Settings.
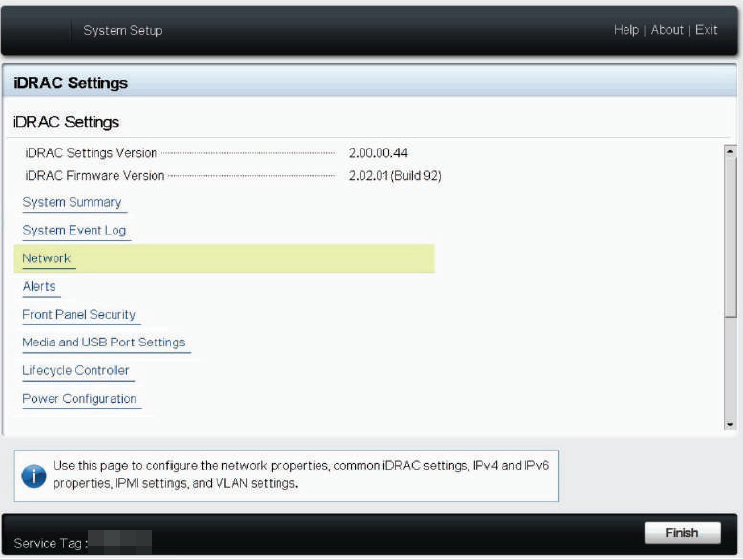
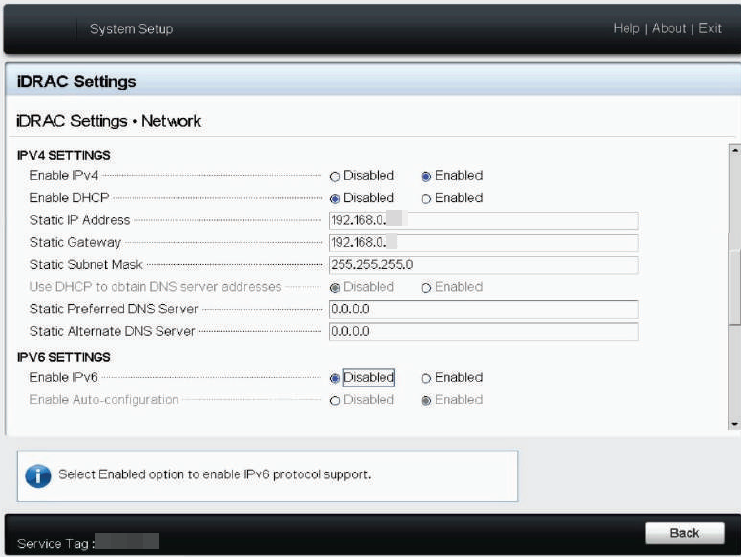
- From the iDRAC Settings screen, select Network
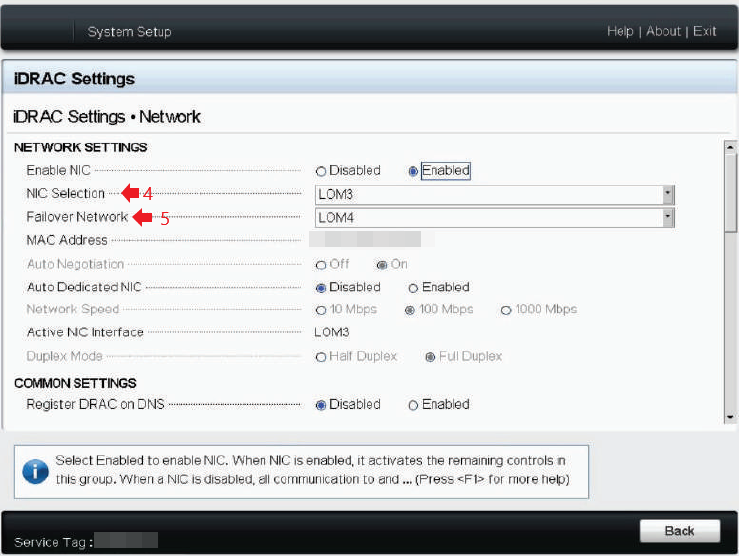
- From the NIC Selection, select LOM3 (for EP - 71XX) LOM1 (for SP - 71X).
- From Failover Network, select LOM4 (for EP - 71XX) LOM2 (for SP - 71X).
-
Configure the IPV4 settings:
- The default Ethernet IP address is: 192.168.0.10
- The default Subnet Mask is: 255.255.255.0
- The default Gateway is: 192.168.0.1 or 0.0.0.0
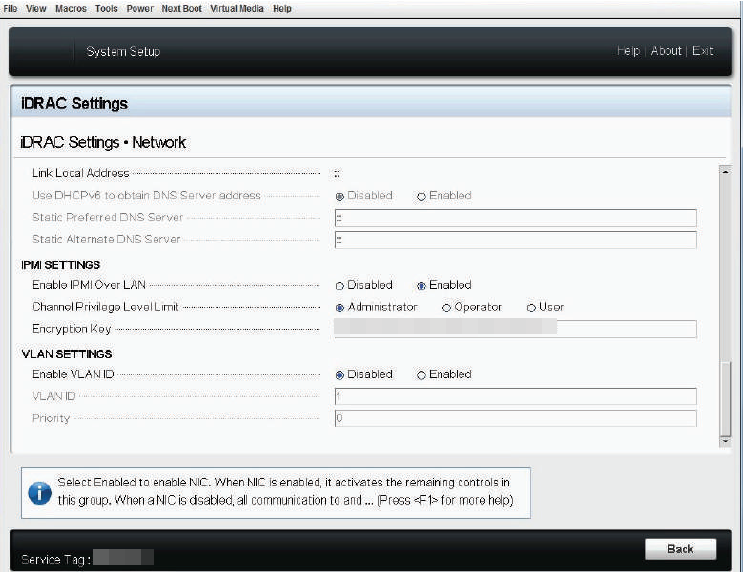
- Configure the IPMI Settings as displayed below.
- Continue the accompanying screens in this order, press Esc.
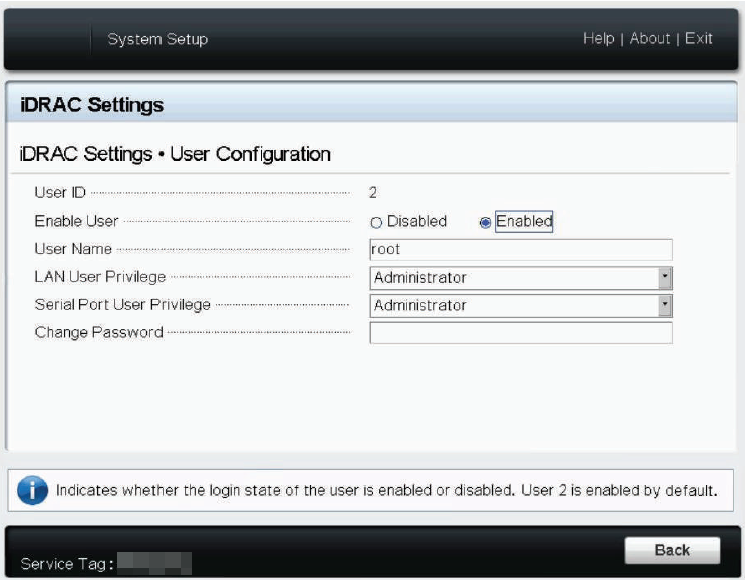
- From the System Setup, iDRAC Settings, select User Configuration.
- From the User Configuration Menu, select Change Password and then press Enter.
-
Use the following passwords:
- d01phEEn or customer password.
- Confirm the password (retype)
- Click Ok.
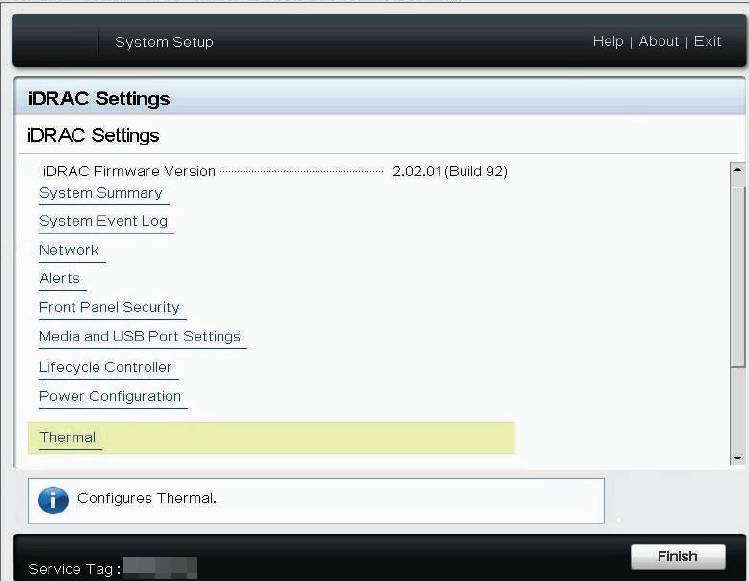
- Press Esc until you reach the iDRAC settings screen.
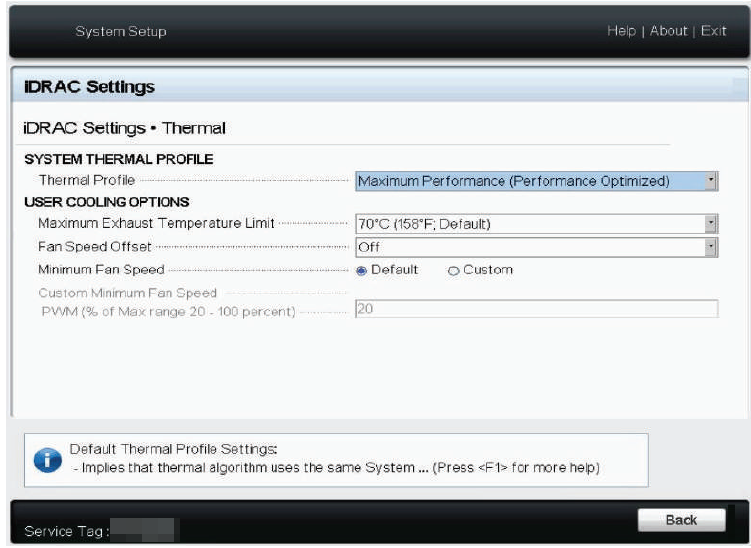
- Choose Thermal
- From the Thermal Settings screen, select Maximum performance
- Press Esc 3 times, and then click Ok.
- Reboot (By clicking Esc and Yes)
-
Press F2 while the system is booting and connect to the configured iDRAC IP with the browser.


Related Article:
Cache Interfaces: No Ping from Router due to SR-IOV BIOS Setting
Content Author: Erick Tovar
Priyanka Bhotika
Comments